

Supplies needed:
1” wide rag strips
- Torn, not cut.
- The color is completely up to you. Calico or gingham are my favorite to use.
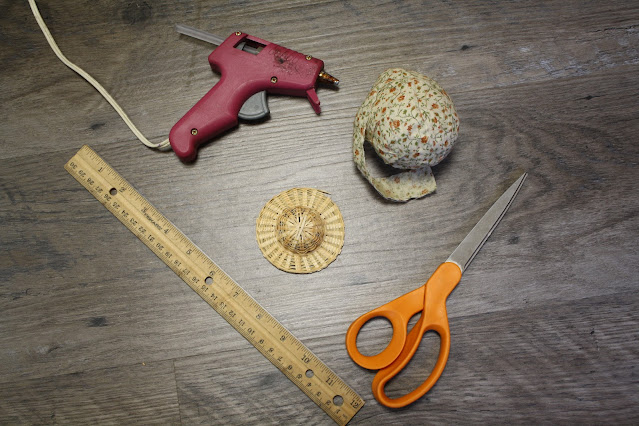
Ruler
Scissors
Hot glue gun
Doll straw hat
First, cut eight to ten rag strips eighteen inches long. The number of strips will vary depending on the thickness of the material you use. We typically use eight to ten strips when using woven cotton.

Using a thin rag strip, tie a knot around the center of your eighteen inch strips as shown below.

Holding the ends of the knot just tied, gently shake down all the rags so they all fall down and are the same length. To form the head, take another small rag strip, fold it in half, and tie it tightly around where the neck would be, approximately one inch from the top of the head. Trim ends of knots.

To form arms, cut four to six rags six inches long. Laying them straight, one on top of the other, fold them in half lengthwise and tie at both ends. Trim knots and ends.


Lift front five or six strips of the doll and center arms underneath.


Tie one rag beneath the arms to form the waist. Trim the knot in back.

Hold the doll up and trim the ends of the dress even, if desired.

Now for the bonnet. Plug in the glue gun. Soak the straw doll hat in a bowl of water for five minutes or so. This enables it to soften enough to be cut and bent without cracking. Once hat is flexible, pat it dry with a towel. Bend the hat around the head to see the desired shape. Cut away unwanted portion.

If you plan to make more dolls, once the bonnet is shaped the way you like, you can trace it onto a piece of cardboard and make a template for future use. After the bonnet is cut, glue the inside rim of the hat where it will be touching the doll's head.


Quickly, before the glue dries too much, bend, shape, and press the bonnet onto the doll's head. Keep held until the glue stays tight.
 |

Trim any unwanted ends and make any needed adjustments and you are finished!

Have fun dollmaking!
 |
~Jayla
No comments:
Post a Comment